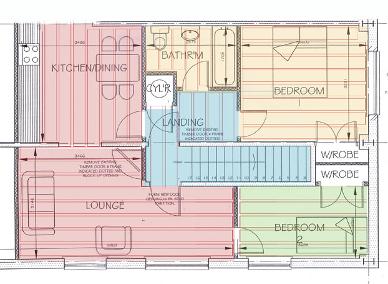
We design each system individually to ensure maximum energy efficiency for the area, taking into account the heating requirements of the room, position of doors & windows, potential problems with existing insulation, proposed use of the area etc. Areas are zoned as necessary.
Installation
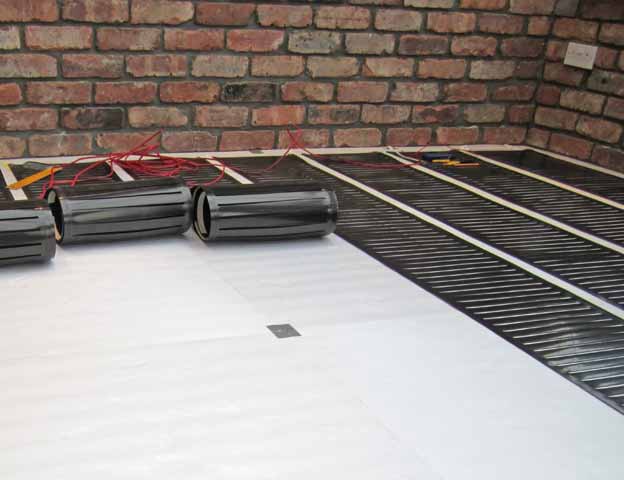
Thermal reflector board is fitted as required & then the heating elements are laid according to the planned layout.
So long as care is taken that the narrow embedded copper braids along the edge of each strip of element are not damaged, then the elements can be stapled or even nailed with no effect ion performance.
No other system can do this.
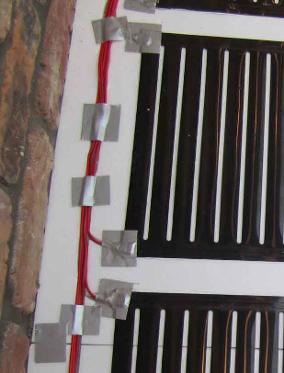
3. Connection
The elements are connected according to the plans and electrical diagram. Connection is made to the 24 volt Transformer.
Under UK Building Regs connection to the mains supply must be certified by a qualified electrician.
4. Cover
EPWarmfloor can be fitted under any type of floor surface or covering.
The system can also be used equally well in walls, ceilings or even outdoors to keep driveways or paths ice-free, or in mobile homes, boats or even greenhouses.
In bathrooms, showers, and wet areas, the heating elements should be installed under a waterproof membrane.
As with any type of underfloor heating, if using carpet a suitably low-Tog underlay and carpet must be used to allow the heat to penetrate to warm the room.
SUMMARY:
It is perfectly possible for you to install the system yourself, so long as connection to the mains is certified by a qualified electrician.
However we do have a list of experienced independent installers who would be happy to quote for full or part installation, or just for checking and certification if required. Just ask us for details of installers in your area.
But of course the system can easily be installed as a d-i-y project.
Here's a video very kindly made by one of our wonderful customers: